Good Containers For Raising Monarch Butterflies
Raising Monarch Butterflies is easy when using the right containers and following some simple steps.
In my first article Raising Monarch Butterflies, I have included some tips on how to get started with rearing Monarch butterflies and where to find larvae.
Some Butterfly Conservatories, Provincial Park stores and online shops offer Monarch rearing kits, and they are a great idea, as they often support Nature Conservancy efforts and include teaching material. However, you can easily make your own if you wish. It’s very easy and only costs a fraction of store bought kits.
Here I will show you some of the containers I am using, and you will probably have some of them in your home already!
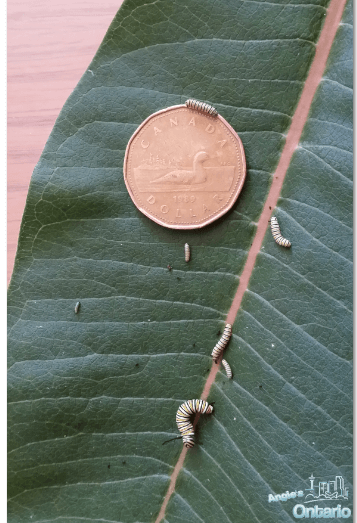
So once you have located some of the tiny eggs (more about Raising Monarch Butterflies here)
you can place them in any small containers like these pictured above and below.
The milkweed leaves and cut outs should be placed on a thin piece of paper towel (unbleached) or newspaper clips inside the container, to prevent it from building mold, which could be fatal to the larvae.
Keep this container anywhere in your home, but away from direct sunlight and extreme temperatures like air conditioners or heaters.
I used a small sandwich container. Great are also the pre-packaged salads tubs you can buy at your grocery store. We eat a lot of salads during the summer, so there is no shortage of suitable containers in my home.
The shiny white/yellowish eggs will slowly turn black with the caterpillar forming inside. It takes about 3-4 days for the tiny caterpillar to hatch. At this time you should add a fresh new milkweed leaf, as the “old” one will now be dry and less nutritious.

Caterpillars will grow very rapidly over the next few days and it’s best to clean the container daily by changing newspaper clips on the bottom and exchanging leaves. Just place a new milkweed into a container and gently pick up the leaves where the caterpillars rest on and transfer it to a new clean container. Do not try to pick them up or touch them, as they are much too fragile to be handled directly. I like to alternate containers, so there is always one or two fresh ones on hand.
Once caterpillars grow to a mature size, they will also produce a bigger amount of waste, so remember to clean their containers daily. If you are a beginner, it’s easier to take care of 1-2 caterpillars at a time.
I used a plastic tub, which is very light weight and I drilled dozens and dozens of small holes into the lid for proper ventilation. The holes are big enough to allow airflow, but too small for the caterpillars to escape through.
Very decorative are also glass terrariums with a screen lid. They may be filled with sand on the bottom
and you can then add plants. You will often see this set up at your local Visitor Centres (Provincial Parks) during the Monarch season. A great place to find terrariums new is Petsmart, or try local yard sales, where you can get bargain prices! Bear in mind that even small to medium terrariums and aquariums are fairly heavy.
I have several terrariums but found that cleaning and maintaining the rubber tubs was much easier for me.
After about two weeks, the caterpillars have grown to a mature size and they should be in a larger container like the one pictured below.
The caterpillars need sufficient room to make their chrysalis, which they will either attach to the container lid or a milkweed leaf.
The adult caterpillars will start to spin a very strong thread that it attaches to a leaf or lid. At this stage, caterpillars will hang upside down, and you might see them “wiggle” out of their skin. This process takes about a day, and the caterpillars are very fragile during this stage as well.
If you accidently dislodge them, they will not recover and fail to form a chrysalis.
At this time it’s best not to remove container lids, until the caterpillars have transitioned into a chrysalis.
Avoid any disruptions by not keeping mature and smaller caterpillars in the same container.
This Monarch caterpillar has now successfully transformed into a chrysalis and is hanging upside down from a milkweed stem.
I am always amazed at how intricate the chrysalis design really is. The first time we saw the Monarch Butterfly pupae, we could not believe our eyes. The light green pupa has small gold dots and a gold band around the top. It’s just amazingly beautiful!
Happy Birthday! This Monarch Butterfly has just emerged from the chrysalis twenty minutes ago. When first “hatched” the body looks fat and plump and the wings are tiny and “crumbled” from resting inside the chrysalis. Over the next two hours the wings will slowly expand and take shape. If the Butterfly does not have sufficient room, or sits at the bottom of a container, wings will be distorted, leaving him unable to fly. Never leave any chrysalis on a container bottom, as it’s important to provide enough room around the chrysalis to allow for the proper formation of the Butterfly wings. The Monarch must be able to spread its wings freely.
I have now placed this newborn Butterfly onto a butterfly bush for a first drink of nectar. Soon he will be ready for his first flight around my flower gardens and
the hopefully migrate to Mexico!
I hope you enjoyed my article about raising Monarch Butterflies and will look forward to raising your own.
In my “best year” of rearing Monarchs, we raised over 310 Butterflies. As my Birthday falls into the months of August, I released 21 Butterflies on my Birthday that year.
It was quite the treat sharing my Birthday with them and sending them off one by one.
Recommended articles:
